
What this feature does
Custom Assistance Types allow organizations to define and organize the services they provide. By creating a structured menu of categories and items, teams can ensure that assistances are recorded consistently across clients, programs, and organization-level activities.
This standardized structure improves data quality, reporting accuracy, and visibility into service delivery.
Who can use this feature
To create or manage custom assistance types, users must have access to Settings and the appropriate administrative permissions.
- Organization Admin – Full access to create and manage custom assistance types.
- Team Members – Can view and select assistance types when recording services but cannot create or edit them.
- Interns / Volunteers – Can view and select assistance types but cannot create or edit them.
- Law Enforcement / Advocates – Can view and assign assistance types but cannot create or edit them.
Before you begin
Before creating custom assistance types, ensure that:
- You have access to Settings within the platform.
- You have permission to manage organization configurations (Organization Admin).
Understanding assistance types
Custom assistance types follow a two-level structure:
Category
The main grouping of services.
Examples: Outreach, Financial Support, Counseling.
Item
A specific service within a category.
Examples: Hygiene Bag, Bus Pass, Therapy Session.
Important: Items must always belong to a category. This hierarchy standardizes how services are recorded and reported across the organization.
How to create custom assistance types
Step 1: Go to Custom Assistance Types
1.Navigate to Settings from the left-hand menu.
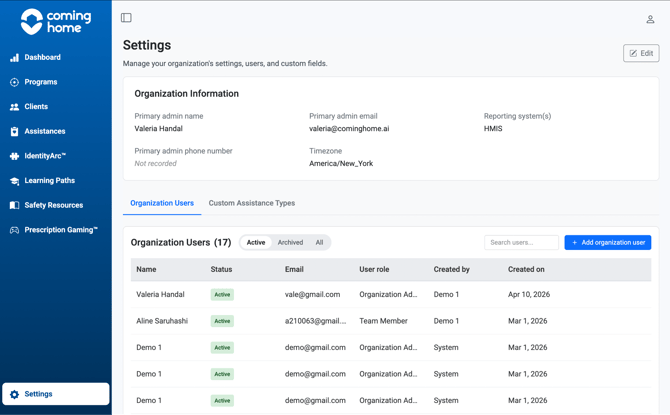
2. Open the Custom Assistance Types tab.
Step 2: Add a new assistance type
1. Click + Add Custom Assistance.
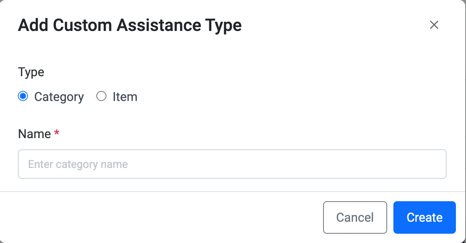
Step 3: Create a category
To create a new category:
- Select Category.
- Enter a name (e.g., Outreach, Emergency Support).
- Click Create.
This will serve as a top-level grouping for related services.
Step 4: Create an item
To create a specific service under a category:
- Click + Add Custom Assistance.
- Select Item.
- Choose a Parent Category.
- Enter the item name (e.g., Hygiene Bag, Transportation Voucher).
- Click Create.
This defines a specific service that can later be selected when recording assistances.
Result
Once created:
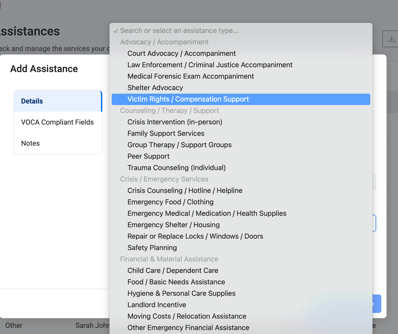
- Categories and items will appear as selectable options when adding assistances.
- Users across the organization will be able to choose from this standardized menu.
- Your organization will benefit from consistent and structured service tracking.
Why this matters
Custom assistance types form the foundation of how your organization tracks impact. By defining your service structure upfront, you ensure:
- Consistent data entry across teams
- Accurate reporting and compliance
- Clear visibility into services delivered
- Improved outcome measurement
- Alignment with funding and evaluation requirements
Tips / Best Practices
- Start with categories first before creating items.
- Use clear and consistent naming to support reporting.
- Keep categories broad and items specific.
- Avoid duplicates to maintain clean and reliable data.
- Align categories with how your organization reports services.
Related Articles
- Overview of Assistances
- How to Assign an Assistance at the Organization Level
- How to Assign an Assistance at the Program Level
- How to Assign an Assistance at the Client Level
- How to Manage Linked vs. Unlinked Assistances
Need more help?
If you need assistance creating or managing custom assistance types, please contact your Organization Administrator. For additional help, use the in-platform chat and select “Report an issue.”