
Assigning team members to a client controls who can view and work with that specific client's profile. This ensures data privacy and allows you to build dedicated care teams for each individual case. There are two ways to assign team members: when creating a new client profile, or by updating an existing client's information.
Who can use this feature
- Organization Administrators: Full access. Only Organization Administrators can assign team members to clients.
- Team Members: Cannot assign team members to clients.
- Interns / Volunteers: Cannot assign team members to clients.
- Law Enforcement / Advocates: Cannot assign team members to clients.
Before you begin
Ensure that the team members you want to assign have already been added to the system and have active accounts.
Method 1: Assigning team members when creating a new client profile
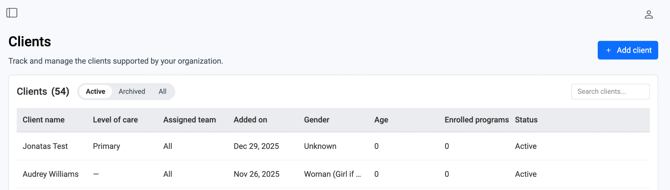
1. Navigate to the Clients tab on the left sidebar and click the Add client button.
2. In the Core Identity section, locate the Team Member Access field.
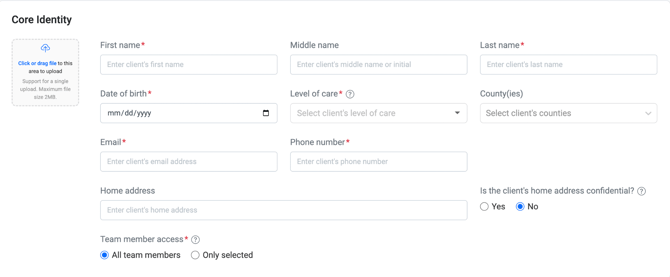

3. Select how you want to manage access:
- All team members: Choose this if the client record should be visible to everyone in the organization.
- Only selected: Choose this to limit access to specific staff members.

4. If you chose "Only selected," select the specific team members from the dropdown list who need access to this client.
5. Complete the rest of the client profile and click Create client to save.
Method 2: Assigning team members to an existing client
1. Navigate to the Clients tab on the left sidebar.
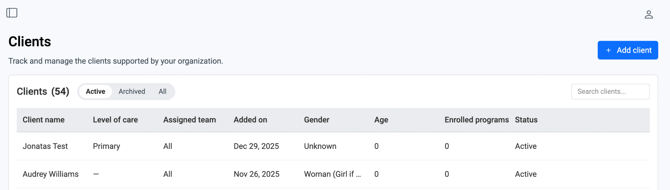
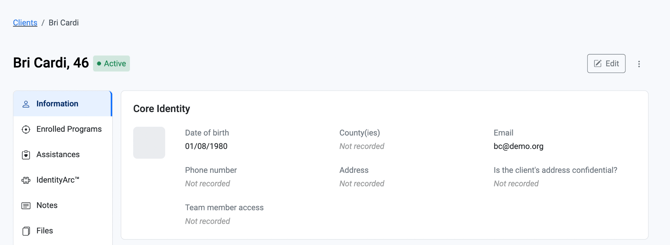
2. Locate the existing client you want to update and click to open their profile (Client Toolkit).
3. Ensure you are in the Information section of the toolkit and click “Edit”.
4. Scroll down to the Core Identity category and locate the Team Member Access field.

5. Update the access level to All team members or Only selected.
6. If using "Only selected," add or remove team members from the selection list as needed.
7. Confirm the changes have been saved to the client's profile.
Result:
The selected team members will now be able to see this client in their Clients dashboard and access the Client Toolkit. Users who were not selected will not see this client.
Tips / Best Practices
- Use the "Only selected" option for sensitive cases or when managing large organizations to prevent staff from being overwhelmed by clients they are not actively supporting.
- Remember that assigning a team member only works if their account already exists in the system. If you need to assign a new employee, create their user account first in Settings.
- Regularly review team member assignments on existing clients, especially when staff roles change or when they leave the organization.
Related Articles
Need more help?
If a team member reports that they cannot see a client they were assigned to, double-check the Team Member Access settings in the client's profile and ensure their changes were saved successfully. If issues persist, contact us through chat support.