
What this feature does
Editing or updating an assessment allows authorized users to correct information or reflect changes in a client’s circumstances during their participation in a program. Since assessments are directly tied to a client’s specific program enrollment, keeping them accurate ensures reliable reporting, compliance, and meaningful outcome measurement.
Updates may include changes to housing status, employment, income, health conditions, or other key well-being indicators captured during Entry, During, or Exit assessments.
Who can use this feature
- Organization Administrators – Can view, edit, and manage all assessments.
- Team Members – Can edit assessments for clients assigned to them.
- Interns / Volunteers – Can edit assessments for clients assigned to them.
- Law Enforcement / Victim Advocates – Do not have access to edit assessments.
Before you begin
Before editing an assessment, ensure that:
- The client is enrolled in a program.
- An assessment has already been created for that program enrollment.
- You have the appropriate permissions to edit the assessment.
How to edit or update an assessment
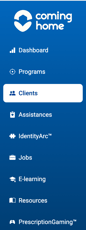
Step 1: Navigate to the Clients section
-
From the left-hand sidebar, click Clients.
-
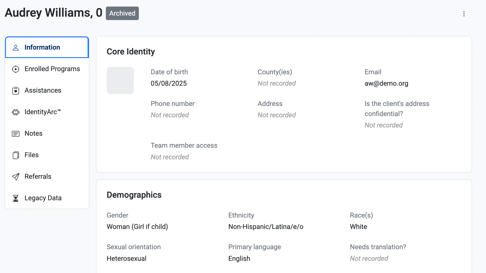
Use the search bar to locate the client.
-
Click the client’s name to open their Client Toolkit.
Step 2: Access the enrolled program
-
Within the client profile, select Enrolled Programs.
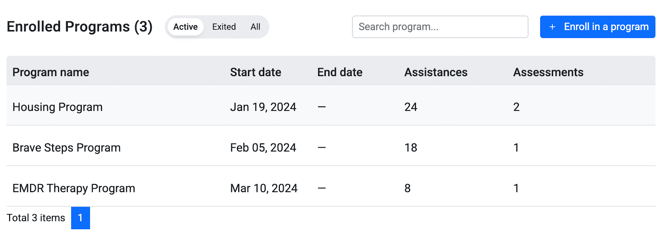
2. Choose the program associated with the assessment you want to update.
Step 3: Open the Assessments tab
- In the selected program, click the Assessments tab.
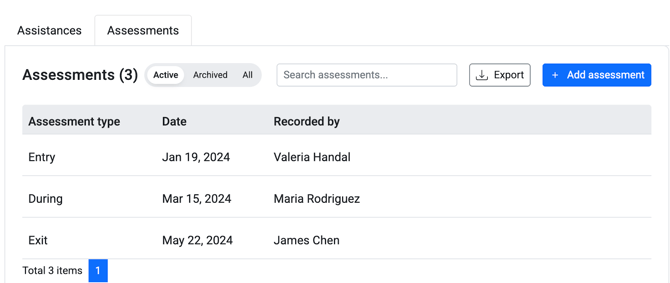
2. A table will display all assessments linked to that program enrollment, including the Assessment Type, Date, and Recorded By.
Step 4: Edit the assessment
- Locate the assessment you wish to update.

- Click the Edit (pencil) icon next to the assessment.

- The assessment form will open, allowing you to modify the necessary fields.
Step 5: Update assessment information
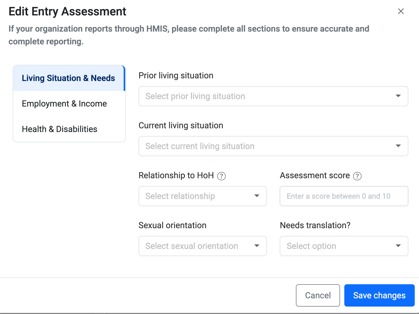
You can update information across the following categories:
1. Living Situation & Needs
- Prior Living Situation
- Current Living Situation
- Relationship to Head of Household
- Sexual Orientation (optional)
- Need for Translation Services
2. Employment & Income
- Education Status
- Employment Status
- Non-Cash Benefits
- Source of Income
3. Health & Disabilities
- Health Insurance
- Experience of Domestic Violence
- Presence of a Disabling Condition
Updating these fields ensures that the assessment accurately reflects the client’s current circumstances.
Step 6: Save the changes
- After making the necessary updates, click Save Assessment.

- The updated assessment will appear in the Assessments table, and the changes will be reflected in reporting and program analytics.
Result
Once saved:
- The assessment reflects the most current and accurate client information.
- Historical context is preserved within the program enrollment.
- The updated data supports program evaluation, outcome tracking, and HMIS/CoC compliance.
Tips / Best Practices
- Review assessments before updating to ensure accuracy and consistency.
- Update assessments promptly when a client’s circumstances change.
- Maintain data integrity by avoiding unnecessary edits to historical information.
- Ensure completeness of all required fields to support reporting and compliance.
- Document significant changes in internal notes if applicable.
Related Articles
- Overview of Assessments
- How to Add an Assessment to a Client
- Overview of Programs
- How to Enroll a Client in a Program
Need more help?
If you need assistance editing or updating an assessment, please contact your Organization Administrator or reach out to our Support Team through the in-platform chat and select “Report an issue.”