
What this feature does
The Notes feature allows service providers to document important information related to a client’s journey. Notes provide a centralized and chronological record of interactions, observations, follow-ups, and service context, ensuring that all team members have access to consistent and up-to-date information.
By maintaining detailed notes, organizations can enhance collaboration, support continuity of care, and ensure compliance with reporting and audit requirements.
Common Uses for Notes
- Recording client interactions or meetings
- Documenting case updates or progress
- Capturing observations and service context
- Logging follow-up actions
- Sharing internal communication among team members
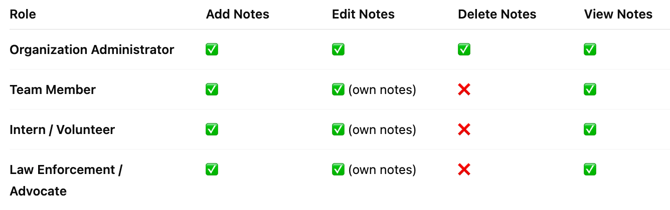
Who can use this feature
Where notes are located
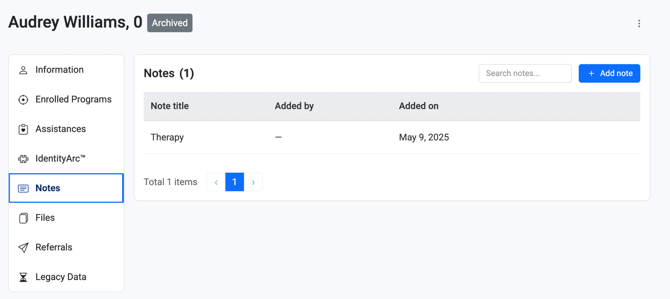
Notes are stored at the Client level within the Client Toolkit, ensuring that all relevant information is centralized and easily accessible.
How to Add a Note
Step 1: Navigate to the Client Profile
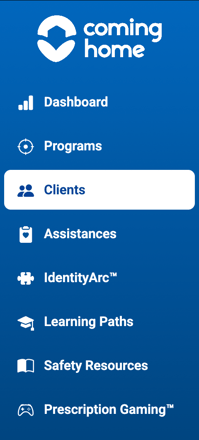
- From the left-hand sidebar, click Clients.
- Search for and select the desired client.
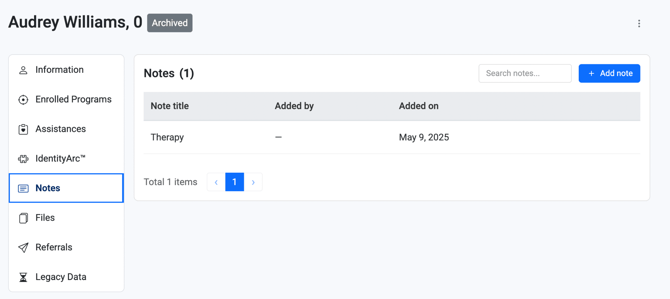
- Open the Notes tab within the Client Toolkit.
Step 2: Create a New Note
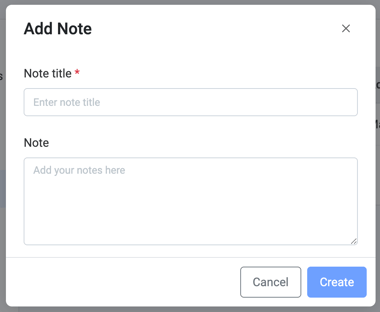
- Click + Add Note.
- Enter the note content in the text field.
- Include any relevant details such as observations, updates, or follow-up actions.
Step 3: Save the Note
- Click Create to finalize the entry.
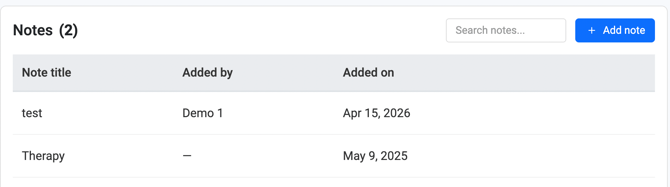
- The note will appear in the client’s notes list, along with:
- Date and time created
- Name of the user who added the note
How to Edit a Note
Step 1: Locate the Note
- Navigate to the Notes tab within the client’s profile.
- Find the note you wish to update.

Step 2: Edit the Note
- Click the Edit (pencil) icon next to the note.

- Update the content as needed.
Step 3: Save Changes
- Click Save to apply the updates.

- The revised note will reflect the most current information.
Permission Reminder: Team Members, Interns/Volunteers, and Law Enforcement/Advocates can only edit notes that they have created.
How to Delete a Note
Step 1: Locate the Note
- Navigate to the Notes tab within the client’s profile.
- Identify the note to be removed.
Step 2: Delete the Note
- Click the Delete (trash) icon next to the note.

- Confirm the deletion when prompted.
Important: Only Organization Administrators can delete notes. This restriction helps preserve data integrity and ensures compliance with audit and reporting standards.
What information is displayed
Each note entry typically includes:
- Note Title
- User who added the note
- Created date and time
Tips / Best Practices
- Be clear and concise: Write notes that are easy for other team members to understand.
- Use objective language: Focus on factual observations rather than personal opinions.
- Document promptly: Add notes immediately after interactions to ensure accuracy.
- Avoid duplication: Review existing notes before creating new entries.
- Protect sensitive information: Ensure compliance with organizational privacy and data protection policies.
Result
By effectively using the Notes feature, organizations can:
- Maintain a comprehensive history of client interactions.
- Improve collaboration among team members.
- Support compliance with reporting and audit requirements.
- Enhance continuity of care and service delivery.
- Ensure accurate and up-to-date client records.
Related Articles
- Overview of the Client Toolkit
- How to Add, Edit, and Delete Files
- How to Assign an Assistance at the Client Level
- Overview of Programs
- Overview of Assessments
Need more help?
If you need assistance managing notes or have questions about permissions, please contact your Organization Administrator or reach out to our Support Team through the in-platform chat and select “Report an issue.”