
What this feature does
Before assigning Challenges, Goals, and Tasks (C, G, T) to clients, organizations must first build their Identity Arc menu. This menu acts as a centralized library of assignments that align with your program structure, care model, and client journey.
Once created, these components become selectable options that service providers can easily assign to clients as part of individualized healing and progress plans. This ensures consistency, scalability, and meaningful outcome tracking across the organization.
Why building the Identity Arc menu matters
Creating a structured Identity Arc library allows organizations to:
- Standardize how client progress is defined and measured.
- Align assignments with organizational programs and methodologies.
- Streamline the process of assigning Challenges, Goals, and Tasks.
- Support outcome measurement and reporting.
- Maintain consistency across teams and service providers.
- Enhance client engagement through clear and actionable progress pathways.
Who can use this feature
Organization Administrators
- View all Identity Arc records within the organization.
- Add new Challenges, Goals, and Tasks.
- Edit existing Identity Arc items.
- Archive and unarchive items.
- Export Identity Arc data.
Team Members
- View Identity Arc records.
- Add and edit Identity Arc items.
- Export Identity Arc data.
- Cannot archive or unarchive items.
Interns / Volunteers
- View Identity Arc records.
- Add and edit Identity Arc items.
- Cannot archive/unarchive items or export data.
Law Enforcement / Advocates
- Do not have access to the Identity Arc feature.
Before you begin
Before building your Identity Arc menu, ensure that:
- Your organization has defined the long-term outcomes (Challenges) you aim to support.
- Supporting Goals and Tasks are aligned with these outcomes.
- You have the appropriate permissions to create or manage Identity Arc items.
- Your program structure and service delivery model are clearly established.
How to build your Identity Arc menu
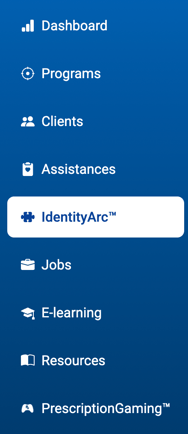
Step 1: Navigate to Identity Arc
- From the left-hand sidebar, click IdentityArc.
Step 2: Add a new Identity Arc item
- Click + Add IdentityArc.
Step 3: Select the assignment type
- Choose the type of item you want to create:
- Challenge – Long-term objectives.
- Goal – Short-term milestones.
- Task – Day-to-day actions.

Step 4: Enter the item name
- In the Name field, enter a clear and descriptive title for the Challenge, Goal, or Task.
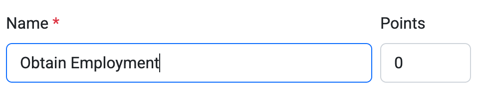
Step 5: Assign a point value
- Add a point value to the item.
- Points are used for internal tracking, such as measuring progress, incentivizing completion, or supporting outcome analysis.
- Important: Points are not visible to clients in the mobile app.
Step 6: Create the IdentityArc item
- Click Create IdentityArc to save the new item.
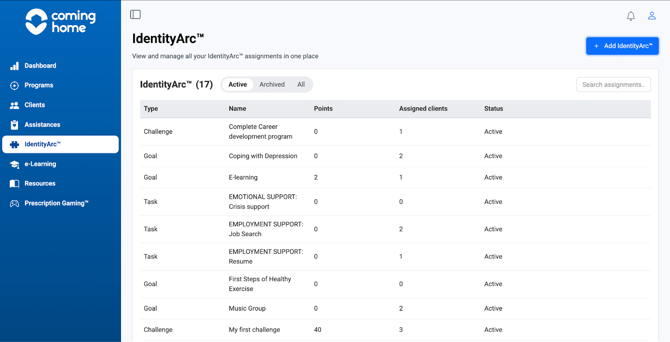
Step 7: Verify the item
- Review the IdentityArc dashboard to confirm that the new Challenge, Goal, or Task has been successfully added.
Understanding the Identity Arc Dashboard
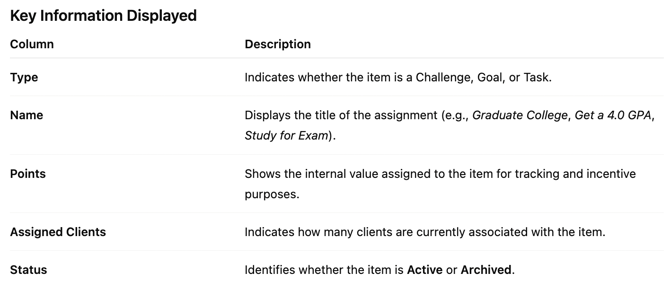
The IdentityArc Dashboard serves as the master library and management hub for all Challenges, Goals, and Tasks. It provides a centralized view of the assignments available for client use.
Key Information Displayed
Filtering and Search Tools
At the top of the dashboard, users can:
- Toggle between Active, Archived, and All Identity Arc items.
- Use the search bar to quickly locate specific Challenges, Goals, or Tasks.
- Export Identity Arc data (based on permissions).
- Add new items using the + Add IdentityArc button.
Tips / Best Practices
- Start with Challenges to define long-term outcomes before creating related Goals and Tasks.
- Use clear and consistent naming to support reporting and usability.
- Assign meaningful point values for internal progress tracking.
- Avoid duplicate entries to maintain a clean and organized library.
- Regularly review and archive outdated items to keep the menu relevant.
- Align the menu with your organization’s programs and care model.
Client Visibility
While Challenges, Goals, and Tasks are created and managed internally, any items assigned to clients become visible within the client-facing mobile app. This shared visibility enhances transparency, engagement, and accountability. However, point values remain internal and are not visible to clients.
Result
Once your Identity Arc menu is built:
- Service providers can efficiently assign C, G, and T to clients.
- Organizations maintain a standardized framework for tracking progress.
- Client journeys are supported by structured and measurable pathways.
- Reporting and outcome evaluation become more consistent and meaningful.
Related Articles
- What is Identity Arc?
- How Goals, Tasks, and Challenges Work Together
- How to Assign a Challenge to a Client
- How to Assign a Goal to a Client
- How to Assign a Task to a Client
Need more help?
If you need assistance building or managing your Identity Arc menu, please contact your Organization Administrator or reach out to our Support Team through the in-platform chat and select “Report an issue.”