
What this feature does
The Files feature allows users to securely upload, store, and manage client-related documentation within a client’s profile. This ensures that all supporting documents are centralized, easily accessible, and auditable by authorized team members.
By maintaining documents within the platform, organizations can improve collaboration, streamline service delivery, and support compliance with reporting and regulatory requirements.
Key Benefits
- Centralized document storage for all client-related files.
- Secure record-keeping with controlled access.
- Easy access to supporting documentation for services.
- Audit visibility, including who uploaded the file and when.
Typical Documents Stored
- Birth certificates
- Social Security cards
- Medical records
- Court documents
- Supporting documentation for services
Who can use this feature
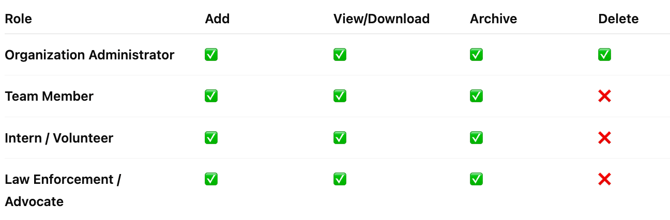
Note: Only Organization Administrators have permission to delete notes to maintain data integrity and auditability.
Where notes are located
Notes are stored at the client level within the Client Toolkit, ensuring that all relevant information is centralized and easily accessible.
How to Upload a File
Step 1: Navigate to the Files Tab
- From the left-hand sidebar, click Clients.
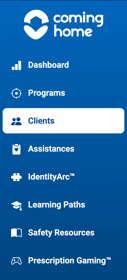
- Select the desired client.
- Open the Files tab within the client’s profile.
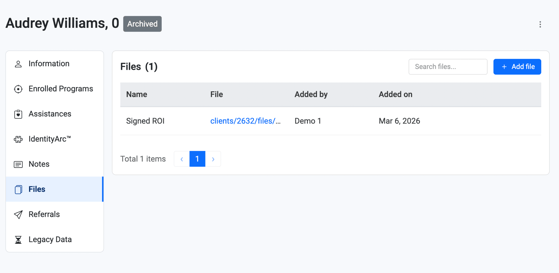
Step 2: Add a New File
- Click the + Add File button.

- The Add File window will appear .
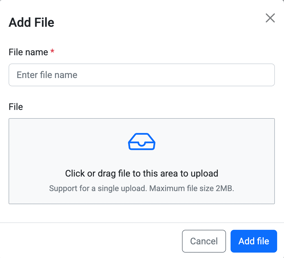
Step 3: Complete the Required Fields
- File Name (required) – Enter a descriptive name for the document.
- Upload File – Drag and drop the file or click to select it from your device.
Step 4: Save the File
- Click Add File to complete the upload.
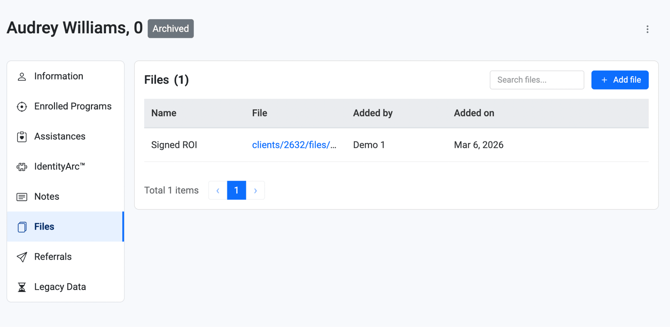
- The file will now appear in the client’s file list, displaying the upload date and user who added it.
How to View or Download a File
- Follow "Step 1: Navigate to the Files Tab" above.
- Locate the desired file in the list.
- Click on the Download Icon to the right of the file:

This allows authorized users to quickly access important documentation when needed.
How to Delete a File
Archiving a file allows organizations to retain historical documentation while keeping the active file list organized.
Steps to Archive
- Navigate to the Files tab within the client’s profile.
- Locate the file you wish to archive.
- Click the Delete Icon option associated with the file.

- Click Delete on the pop up to fully remove the file from the system.
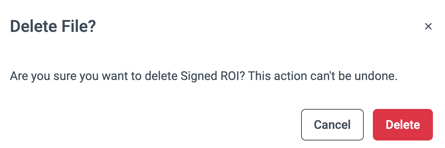
Permission Reminder: Only Organization Administrators can delete files.
Tips / Best Practices
- Use clear and descriptive file names to make documents easy to identify.
- Upload relevant documentation promptly to maintain accurate records.
- Archive instead of deleting files whenever possible to preserve historical data.
- Ensure compliance with privacy and security policies when handling sensitive information.
- Verify file size and format before uploading to avoid errors.
Result
By using the Files feature, organizations can:
- Maintain a secure and centralized repository of client documentation.
- Improve collaboration among team members.
- Support compliance with audits and reporting requirements.
- Ensure quick and reliable access to essential records.
- Preserve historical documentation through archiving.
Related Articles
- Overview of the Client Toolkit
- How to Add, Edit, and Delete Notes
- How to Assign an Assistance at the Client Level
- Overview of Programs
- Overview of Assessments
Need more help?
If you need assistance uploading or managing files, please contact your Organization Administrator or reach out to our Support Team through the in-platform chat and select “Report an issue.”